
- When installing this option, turn OFF the main power and unplug the power cord from the wall socket. If installing without turning OFF the main power, an electric shock or a malfunction may occur.

Before installing this option, attach the "Bridge Unit BU3090" and "LCIT PB3290" or "Paper Feed Unit PB3300/PB3280" first.
Depending on the floor of the installation location, apply the felt cushion to the staple stand to prevent scratches. For details about applying the cushion, see step 17 and later.
Felt cushion Floor type Apply Tile, steel, coated, flooring Do not apply Carpet
Remove the packing tape and retainers, and then remove the accessories (screws, etc.).
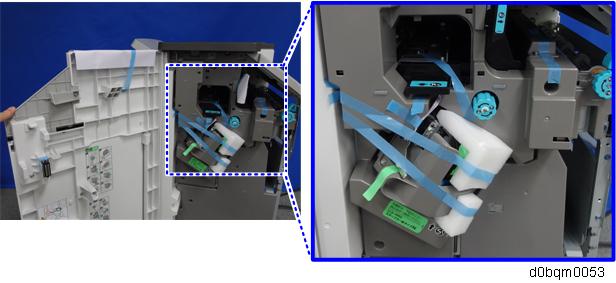
- Open the front cover, and remove the packing tapes, shipping retainers.
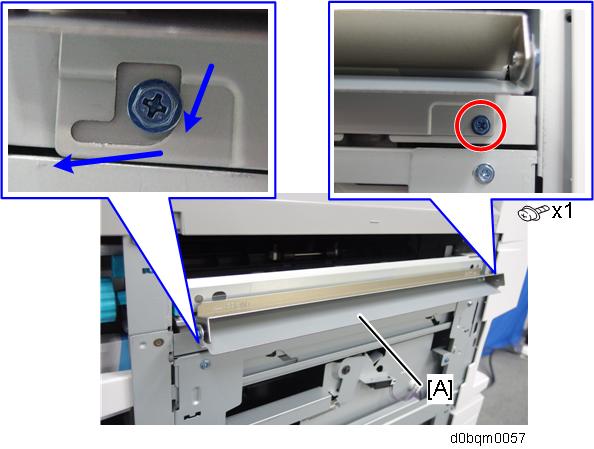
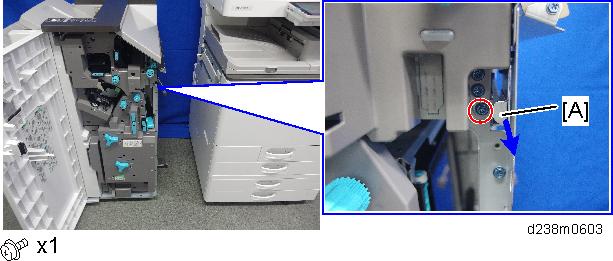
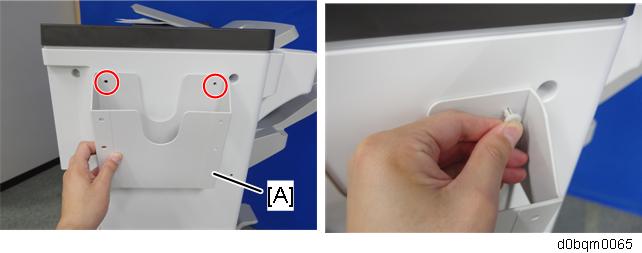
2000-sheet Booklet Finisher- Remove the fixing bracket [A].
Keep the screws that were removed and reuse them for attaching the supplied booklet stapler unit fixing cover [A] in step 5.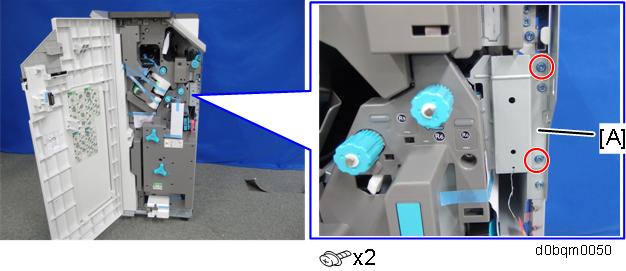
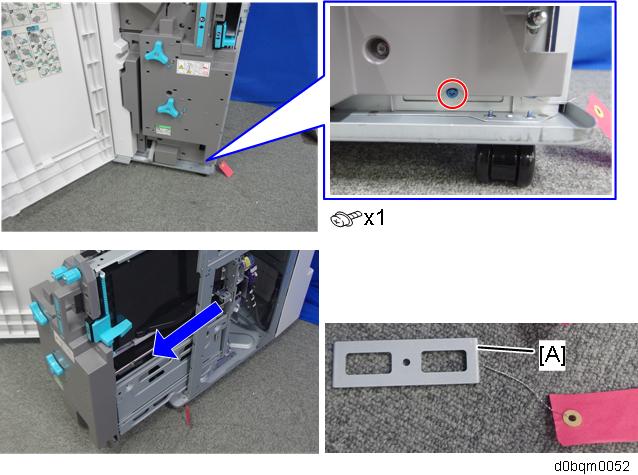
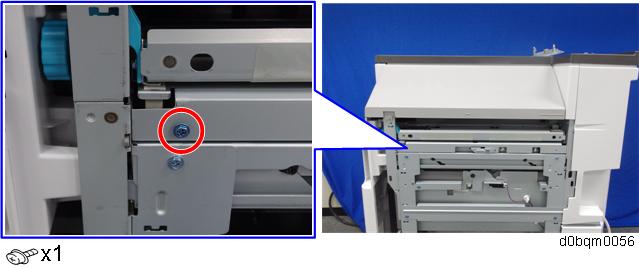
- Remove the screw at the lower part of the finisher (red circle).
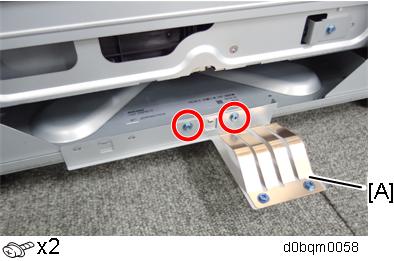
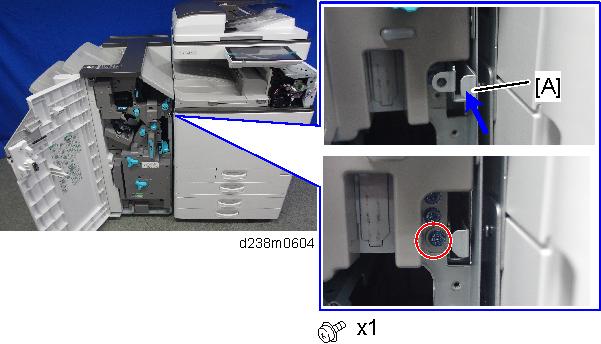
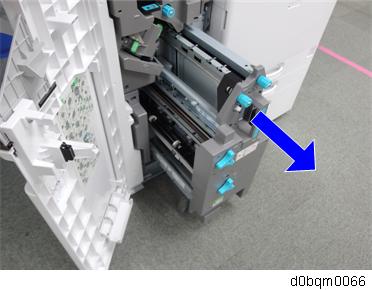
- Pull out the saddle stitch unit and remove the fixing bracket [A].
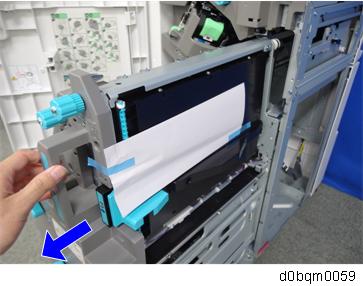
- Remove the packing tapes and shipping retainers on the saddle stitch unit.
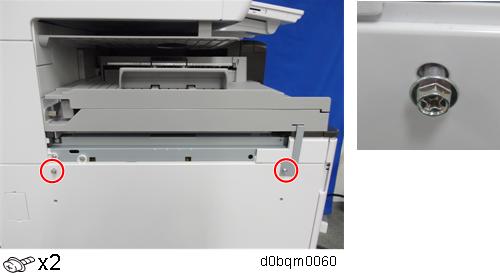
- Attach the supplied booklet stapler unit fixing cover [A].
Use the screws removed in step 1.
When you attach the Punch Unit PU3090, it is not necessary to attach this cover.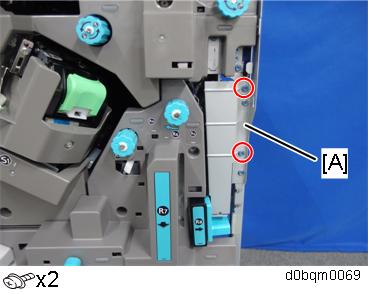
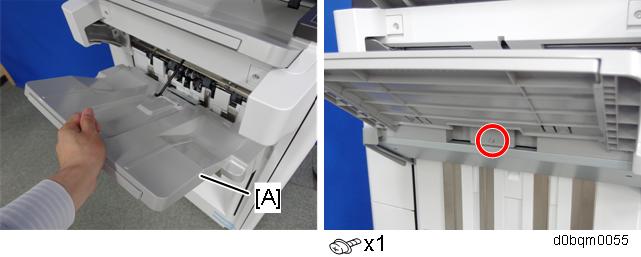
- Remove the packing tapes, shipping retainers.
- Remove the fixing bracket [A].
- Attach the shift tray [A] (3x8).
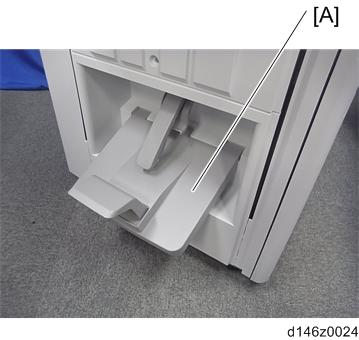
- Attach the booklet tray [A] (2000-sheet Booklet Finisher only).
- Attach the relay guide plate [A] in the following procedure.
- Temporarily attach the screw on the front side (3x6).
- Hook the relay guide plate [A] on the screw attached in step 1, then fully tighten the screw on the rear side (3x6).
- Fully tighten the screw on the front side.
- Temporarily attach the screw on the front side (3x6).
- Attach the ground plate [A] (3x6).
Attach the joint bracket [A] to the machine in the following procedure.
Temporarily attach the screws on the upper screw holes (4x12).
- Hook the joint bracket [A] on the screws attached in step 1, then adjust the position so that the screw head comes to the center mark of the scale.
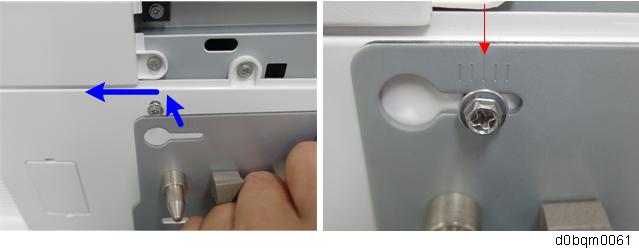
Fully fix the joint bracket [A] (4x12).
Tighten the joint bracket [A] and bracket [B] of the bridge unit together.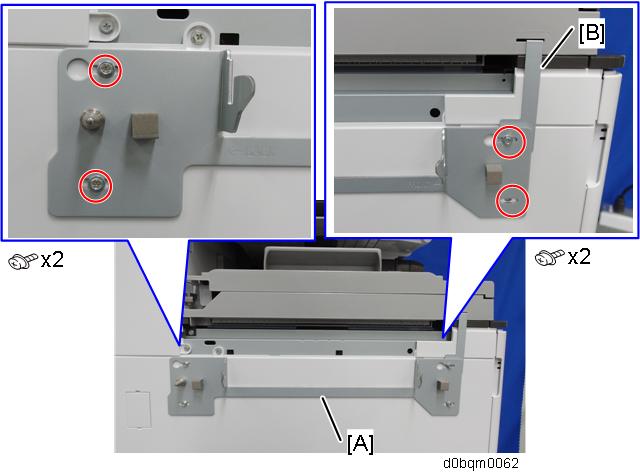
- Clean the right side of the upper cover with a cloth moistened with alcohol, and then attach the cushion [A] to the finisher.
Make sure that the cushion is aligned with the guide rib of the upper cover.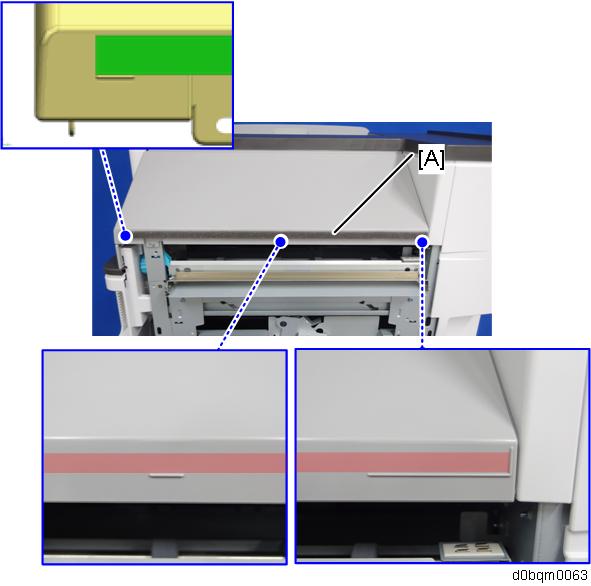
- Remove the connector cover [A] on the right side of the main machine.
When the Internal Multi-Fold Unit FD3010 is installed, it is not necessary to remove this cover.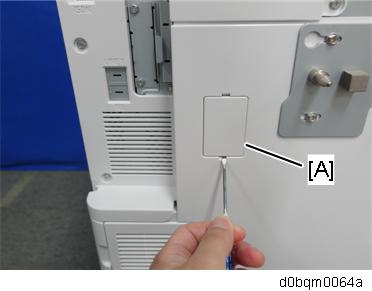
When the Internal Multi-Fold Unit FD3010 is installed, connect the finisher cable to the connector on the internal multi-fold unit.
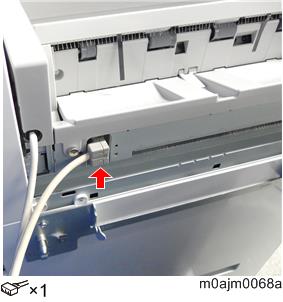
- Remove the screw on the connection lever [A] and pull the lever.
- Connect the finisher to the main unit, and then push in the connection lever [A] to fasten it to the main unit.
When the Internal Multi-Fold Unit FD3010 is installed, make sure that the finisher’s 2 cables are not crossing each other before you connect the finisher.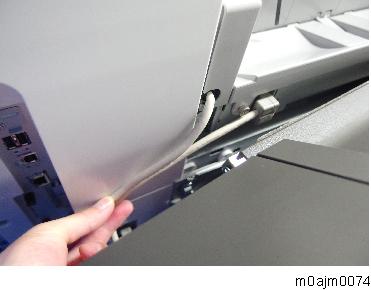
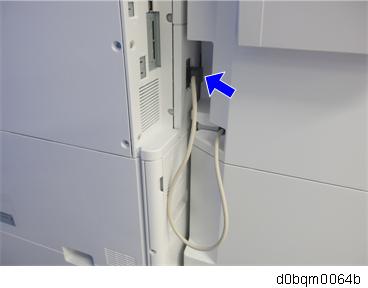
- When the bridge unit is installed, connect the interface cable to the machine.
- Attach the tray holder [A].
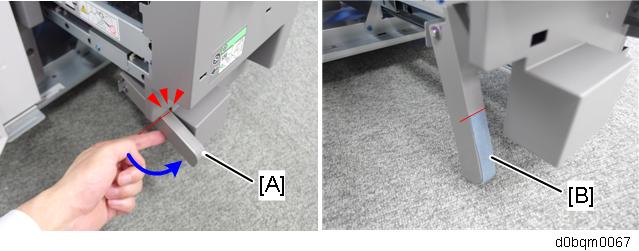
- Pull out the saddle stitch unit.
Lift the staple stand [A] until it comes into contact with the inner cover, and then apply the felt cushion [B].
Apply the felt cushion with the base at the point where the staple stand comes into contact with the inner cover. Be sure to apply the cushion to wrap the staple stand, so that the cushion does not protrude.
Close the front cover.
- Turn ON the main power.
- Deliver some A3/DLT paper to the proof tray and check if the vertical registration is correct according to the adjustment scale for A3/DLT paper (Side-to-side Registration Error (Finisher Registration Adjustment)).
- Check that the finisher can be selected on the operation panel, and check the finisher’s operation.