
- The main machine weighs approximately 88 kg (194.1 lb.). Make sure to lift it with the help of at least one more person.
- The machine should be held at the correct locations and lifted gently. If it is lifted without care, handled carelessly or dropped, it may result in an injury.
- When installing this option, turn OFF the main power and unplug the power cord from the wall socket. If installing without turning OFF the main power, an electric shock or a malfunction may occur.
- Be sure to join the machine to the paper feed unit so as to prevent equipment from falling over. If they are not connected, they may move and fall over, resulting in injury.
Remove the packing tape and retainers, and then remove the accessories (fixing screws, etc.).

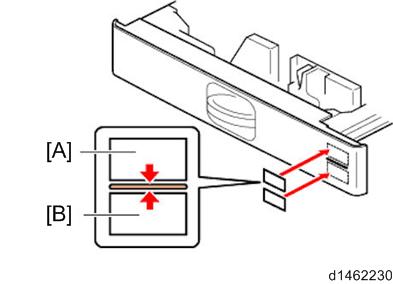
- When unpacking the paper feed unit, do not grip the stay [A]. Doing so may deform the stay, that results in a paper feeding problem.
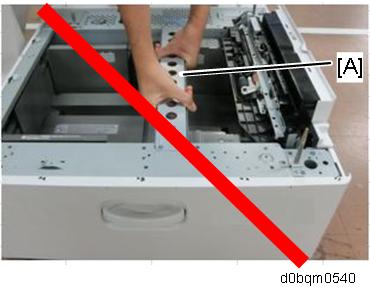
- When unpacking the paper feed unit, do not grip the stay [A]. Doing so may deform the stay, that results in a paper feeding problem.
- Holding the grips on the machine, align the machine with the locating pins [A], and place the machine on the paper feed unit.
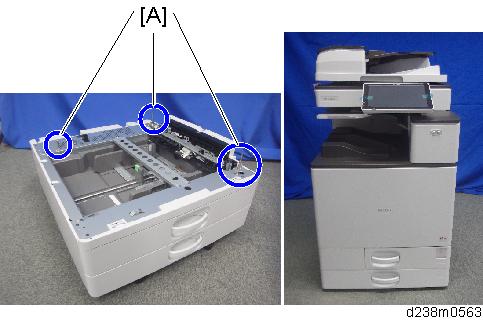

- When you lift the machine, hold the correct locations.
- Do not lift the machine by holding the scanner unit, etc., because this may cause the machine to deform.
- Do not put the machine down on the paper feed unit as a temporary resting place. This may cause the paper feed unit to deform. Always connect the machine and paper feed unit properly.
- When you lift the machine, hold the correct locations.
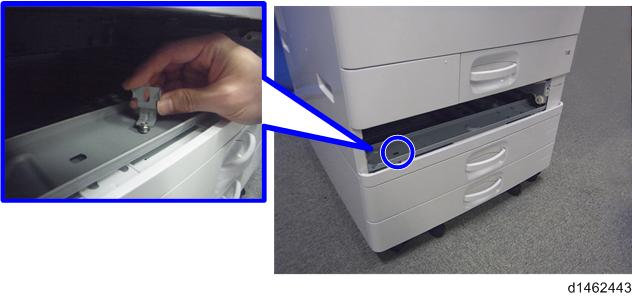
- Pull out the 2nd paper feed tray.
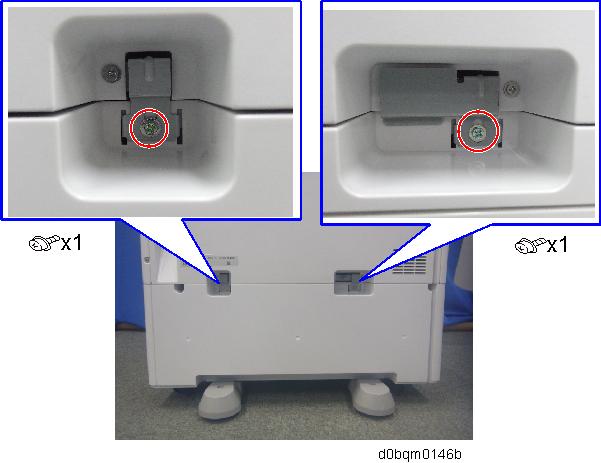
- Using a securing bracket as a screwdriver, fix the machine to the feed unit (spring washer: screw: M4×10).
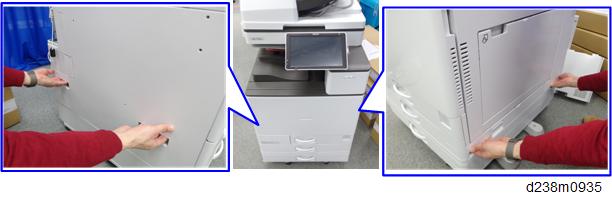
- Attach the securing brackets to two positions on the left and right at the rear of the machine (screw: M4×10).
- Reattach the paper feed tray to the machine.
Attach the paper size decal at [B].
[A]: Tray number decal ( is affixed at the factory.)
[B]: Paper size decal
- The pare paper size decals are packaged together with the main machine.
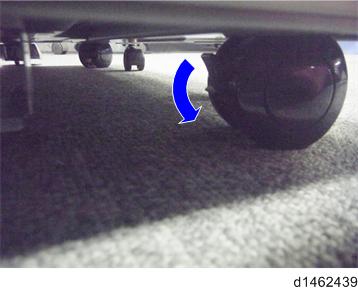
- Lock the casters of the paper feed unit.
Connect the power cord to the machine.
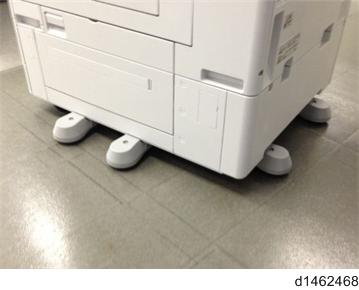
- Stabilizers are attached to the machine when it is shipped. Do not remove them.
- Turn ON the main power.
- Set the paper, and check that the paper size set in the paper feed tray is displayed on the operation panel.
- Adjust the registration for the paper feed unit.
- SP1-002-004 (Side-to-Side Registration Paper Tray 3)
- SP1-002-005 (Side-to-Side Registration Paper Tray 4)
SP descriptions
- SP1-002 (Side-to-Side Registration)
Adjusts the side-to-side registration by changing the laser main scan start position for each mode and tray.
Increasing a value: The image is moved towards the rear edge of the paper.
Decreasing a value: The image is moved towards the front edge of the paper.