
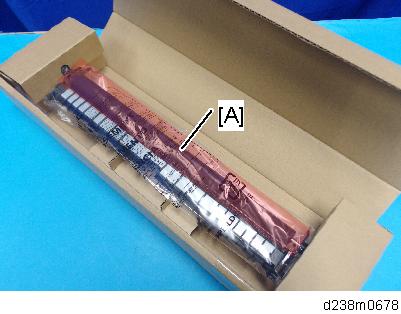
- Do not touch the roller surface during replacement. Also, when taking out the unit from the box, be careful not to touch the roller surface [A].
- Turn ON the main power.
Enter the SP mode, and set SP2-400-001(Paper Transfer Roller Settings Width of Paper Transfer Roller) to "1: Wide roller".

- When SP2-400-001 is changed over, a message is displayed stating "Switch the power OFF/ON".
- After the SP is changed, turn OFF the main power.
Replace the roller [A].
For details about how to replace the roller, refer to Paper Transfer Roller.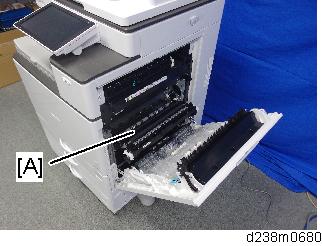
- During PM replacement, do not install the wrong type of roller.
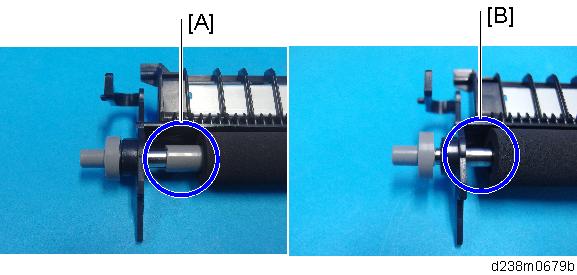
[A]: The standard roller has a gray collar at its end.
[B]: Imageable Area Extension Unit Type M19 does not have a collar on it.
- During PM replacement, do not install the wrong type of roller.
- After replacing the paper transfer roller, turn ON the main power.
- Load SRA3 paper in Tray 2, and then print a full-bleed halftone test page to check if the print area extends to 315 mm in width.
SP descriptions
- SP2-400-001 (Paper Transfer Roller Settings)
Specifies the width of the Paper Transfer Roller. This SP must be set to"1" when Imageable Area Extension Unit Type M19 is installed.
0: Default roller
1: Wide roller