- Turn ON the main power.
- Set SP4-688-002 (Scan Image Density Adjustment 1-pass DF) to "101".
- Execute SP4-730-002 (FROM Main Factory Setting Execution ON/OFF).
- Check the vertical registration for the SPDF.
- Create an original as shown in the following picture.
The large white arrow indicates the direction of feed.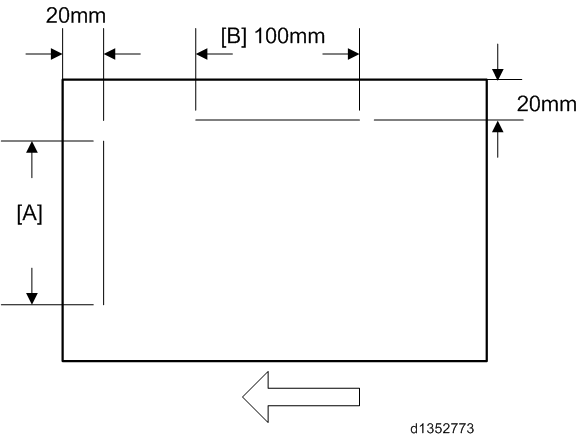
- Copy the original and make sure that the position of line [A] is within 0±1mm
- If not within the standard, adjust with the SP modes.
SP6-006-001 (ADF Adjustment Side-to-Side Regist: Front)
SP6-006-002 (ADF Adjustment Side-to-Side Regist: Rear)
- Create an original as shown in the following picture.
- Check the horizontal registration for the SPDF.
- Copy the original and make sure that the position of the line [B] that you wrote on the original (see above) is within 0±2mm.
- If not within the standard, adjust with the SP modes.
SP6-006-010 (ADF Adjustment L-Edge Regist (1-Pass): Front)
SP6-006-011 (ADF Adjustment L-Edge Regist (1-Pass): Rear)
- Check the skew.
- Make sure that the difference between both end positions of the line [A] that you wrote on the original (see above) is within 0±2mm.
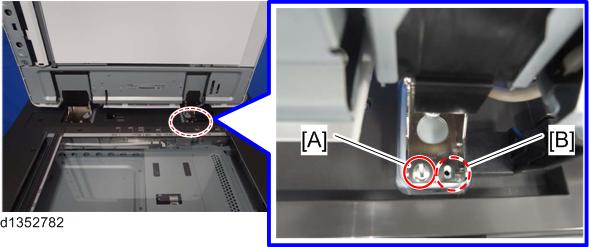
- If not within the standard, change the position of the fixing screw [A] to the long hole [B] at the right hinge.
SP descriptions
- SP4-688-002 (Scan Image Density Adjustment: 1-pass DF)
Adjusts density difference between Book and ADF. This SP is only for the SPDF models. - SP4-730-002 (FROM Main Factory Setting Execution ON/OFF)
Copies the parameters written in FROM in the SPDF to the engine board in the MFP. This SP is only for the SPDF models.