This section describes how to set an IP address on this option manually. Note that you can set an IP address which is not only on the same network segment but also on a different network segment to share a single printer with devices in multiple networks.

- You cannot change the IP address for this option from the operation panel of the main machine. The setting must be done from a web browser on your PC.
- The network setting of this option is initially assigned as follows:
IP address: 192.168.100.100 / Subnet mask: 255.255.255.0 - The network setting of your PC must be in the same network segment to change the network setting of this option.
- Make a note of the current network settings of your PC.
- Change the IP address on your PC to [192.168.100.xxx (*0 - 255)].
- Change the subnet mask on your PC to [255.255.255.0].
- Open a web browser.
- Type [http://192.168.100.100/] in the address bar.
Press the "Enter" key.

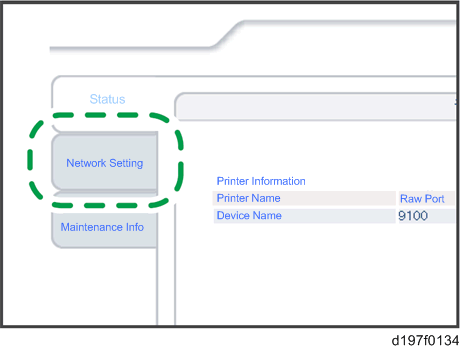
- The setting screen for this option appears.
- Click [Network Setting].
- Type [root] in the user name textbox and click [OK].
- Input [IP Address], [Subnet Mask] and [Default Gateway].
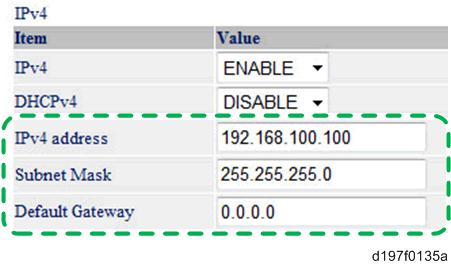
- Set other items if needed.
- Press [Set]
- Close the web browser.
- Disconnect the Ethernet cable from the PC.
- Connect the Ethernet cable to a network device (e.g. switching hub).
- Set the IP address of this option in the printer driver which you use.