
- When installing this option, turn OFF the main power and unplug the power cord from the wall socket. If installing without turning OFF the main power, an electric shock or a malfunction may occur.
- Take out of the shipping box, and remove the packing tapes and shipping retainers.
- Pull out the finisher interface cable, and move it away from the machine.
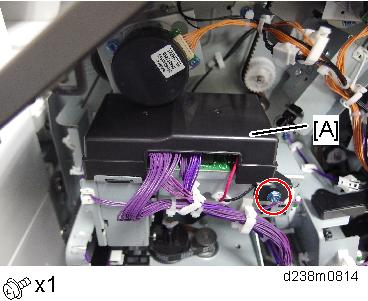
- Remove the finisher rear cover [A] (
 ×3).
×3).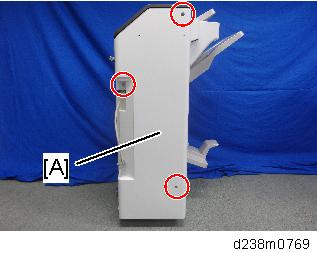
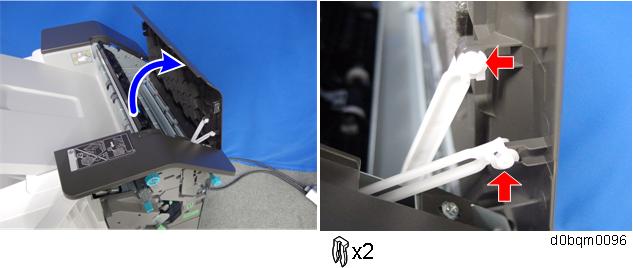
- Open the top cover, and then remove the arms.
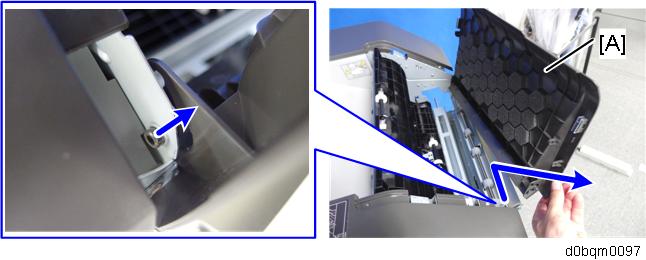
Remove the top cover [A].
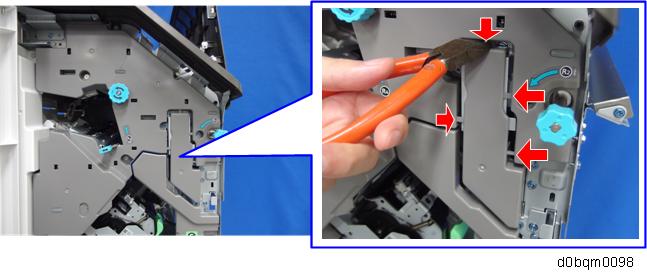
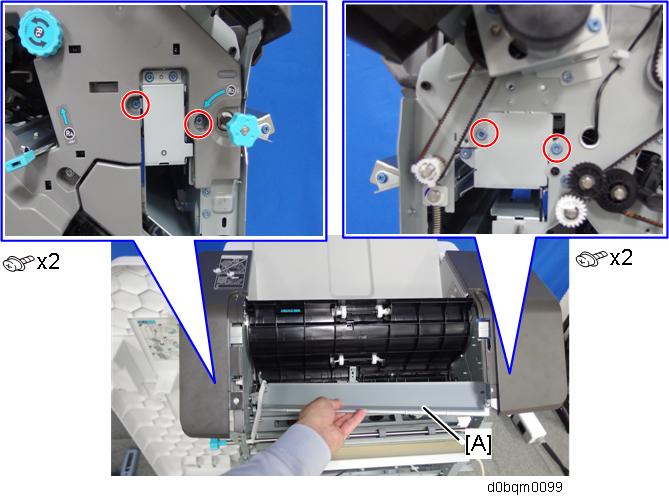
- Cut off part of the finisher inner cover.
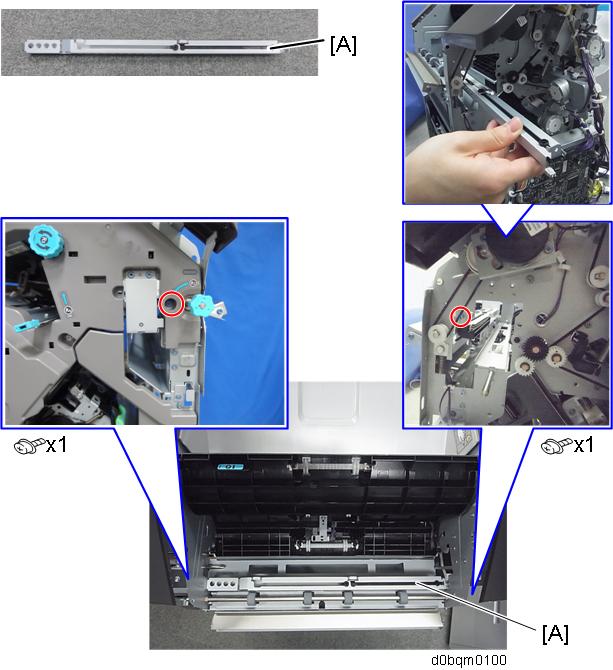
- Remove the guide plate [A].
- Insert and attach the guide plate [A] from the rear.
- Insert and attach the side-to-side detection unit [A] from the rear.
*Front: The two shafts of the unit are passed through bearings in the finisher.In the following figure, the inner cover has been removed so that the bearings’ position can be seen. The inner cover is actually not removed.
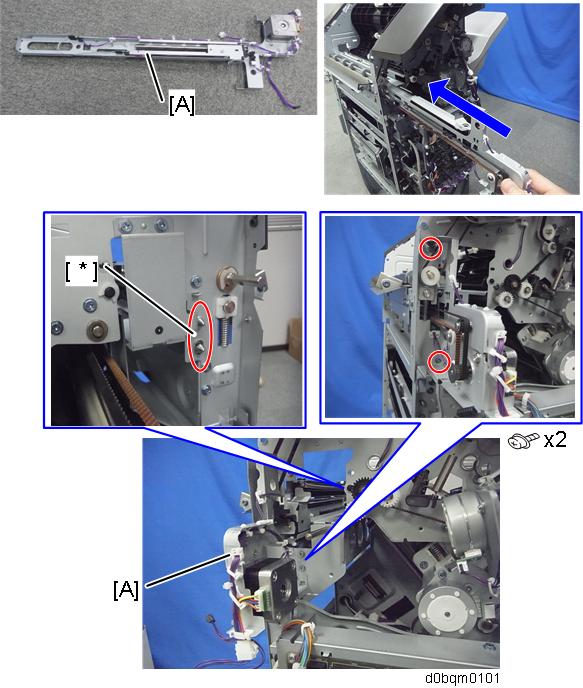
Connect the harness at the bottom part of the side-to-side detection unit to the connector on the finisher.
- Insert and attach the punch unit [A] from the rear.
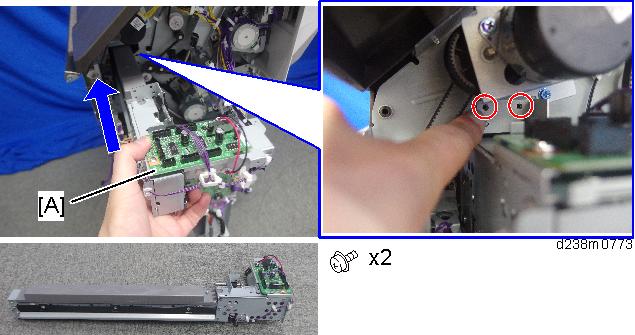
- Attach the punch unit movement motor unit [A] so that the gear [B] meshes firmly (×2).

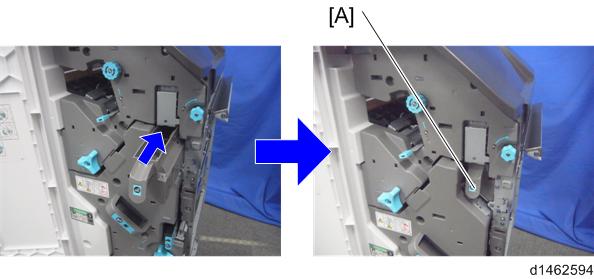
- Insert the hopper [A].
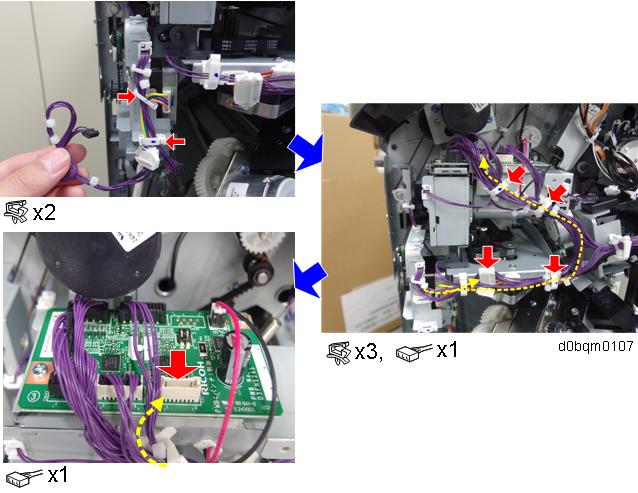
- Connect the harnesses in the following procedure.
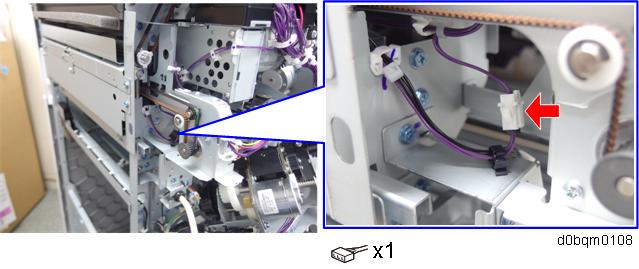
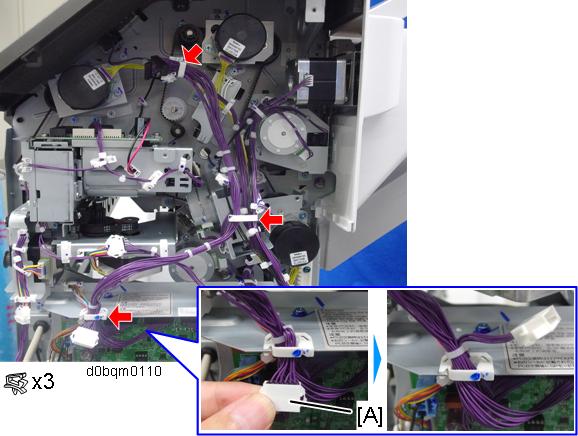
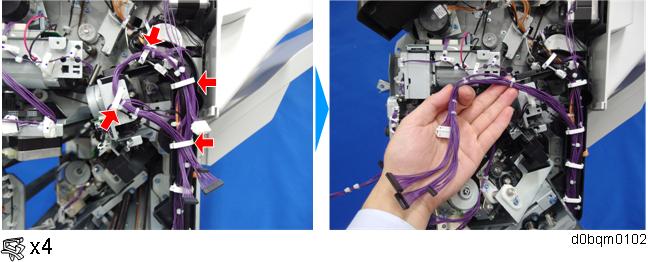
1000-sheet Booklet Finisher- Unclamp the harness [A] at the rear part, route the connector through the top part and then clamp it.
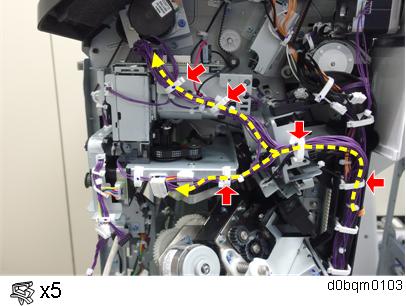
- Route the harness as shown below.

- Connect the harness to the punch unit board.
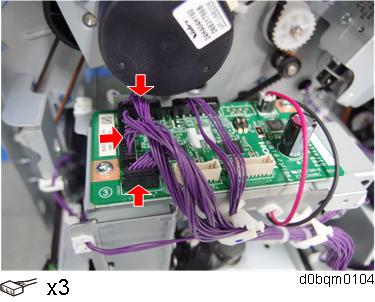
Route the harness [A] of the punch unit movement motor unit, and then connect it to the punch unit board.
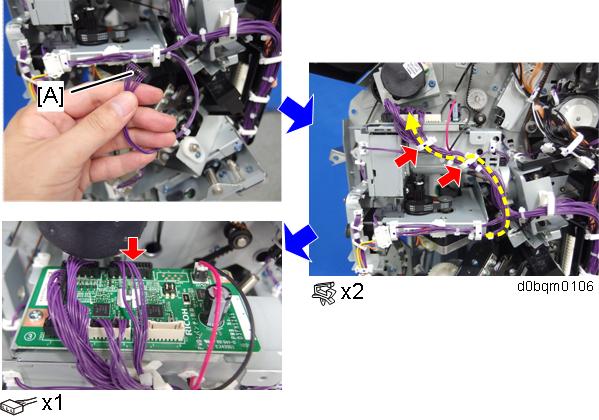
Release the harness of the side-to-side detection unit, and then route it as shown below.
1000-sheet Finisher
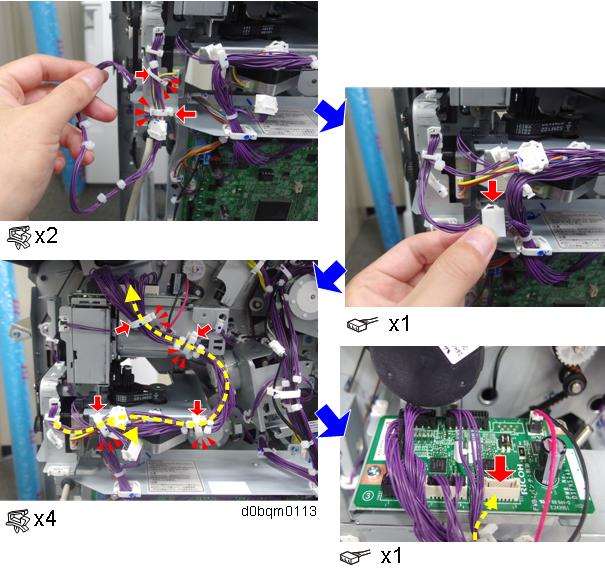
- Release the harnesses clamped at the rear part of the finisher.
- Route the harness as shown below.
Connect the harness to the punch unit board.
Route the harness [A] of the punch unit movement motor unit, and then connect it to the punch unit board.
Release the harness of the side-to-side detection unit, and then route it as shown below.
- Unclamp the harness [A] at the rear part, route the connector through the top part and then clamp it.
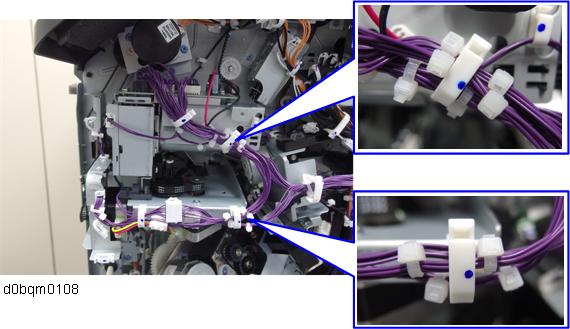
After connecting all the harnesses, check that the cable tie has been applied to the following positions next to the clamps.
- Attach the supplied cover [A] to the punch unit board.
- Reattach the covers that you removed.
- Close the front cover.
- Reconnect the finisher to the machine, and connect the interface cable.
- Turn ON the main power.
- Check that the punch can be selected at the operation panel, and check the operation.