
- When installing more than one SD card, perform the merge operation (SD Card Appli Move).
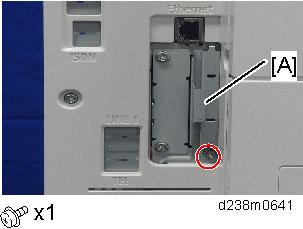
- Remove the SD card slot cover [A].
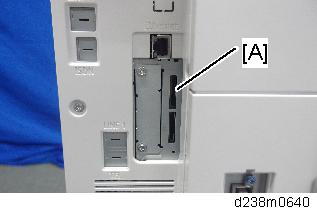
- Insert the OCR Unit SD card in SD card slot 1 [A: Upper Slot].
- Turn ON the main power.
- Enter the SP mode, and then press "Enter" in SP5-878-004 (Option Setup: OCR Dictionary).
The SD card ID is saved in the NVRAM, and the ID of the MFP is saved on the SD card. The MFP and SD card are thereby linked. When "operation complete" is displayed, press "Close".
- If installation fails, "Failed" is displayed.
- If installation fails, perform the following steps.
- Check whether it is a used SD card.
- Switch the power OFF, and repeat steps 1-5.
- Turn the machine OFF and back ON again.
Press "Enter" in SP5-878-004 (Option Setup: OCR Dictionary).
Dictionary data is copied to the HDD.- On the first run, SP5-878-004 links the SD card, and on the second run, copies dictionary data.
- Turn OFF the main power.
Remove the SD card from the SD card slot.
- Keep the SD card in the SD card storage location of the MFP. The original SD card is needed in the event of a HDD malfunction.
- Reattach the SD card slot cover.
- Turn ON the main power.
- Press [File Format / File Name] on the scanner function screen.
- Check that [OCR setting] is displayed on the "File format / "File Name" screen.
- After installation, the OCR setting can be changed on the "OCR setting" screen.
- When setting OCR, set [OCR setting] to [Yes]. (Default setting: [No])