
- When installing this option, turn OFF the main power and unplug the power cord from the wall socket. If installing without turning OFF the main power, an electric shock or a malfunction may occur.
- Remove the rear upper cover [A] and the rear lower cover [B].
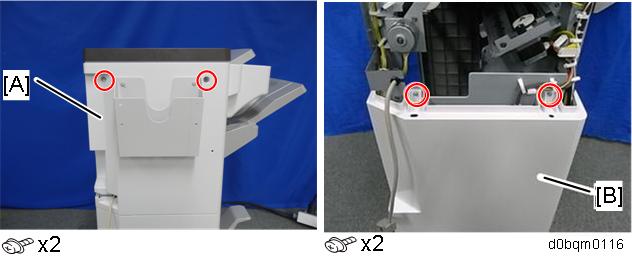
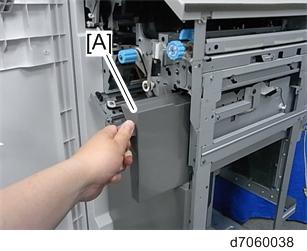
- For 2000-sheet booklet finisher, remove the cover [A] of the booklet finisher unit.
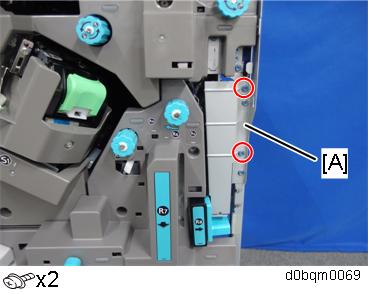
Remove the inner cover [A] (
 ×3,
×3,  ×1)
×1)
- There is a connector on the back of the inner cover.
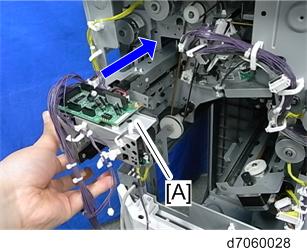
Remove the punch guide plate [A]

- Attach the registration guide plate [A]. ( ×2)
[A]: Rear, [B]: Front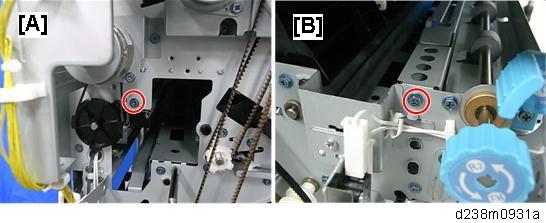
Attach the side-to-side detection unit [A].
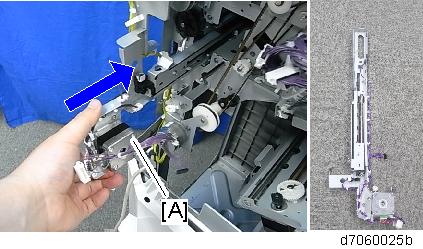
- Insert the front pins of the side-to-side detection unit into the holes of the frame.
- Insert the front pins of the side-to-side detection unit into the holes of the frame.
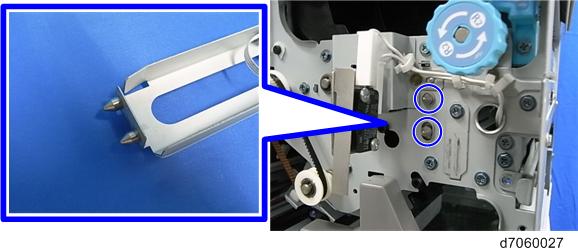
Attach the punch unit [A]. (
×2)- After inserting the pins [B] of the punch unit stay into the front and rear holes of the punch unit, fix the punch unit with two screws.
- Rear
- Front
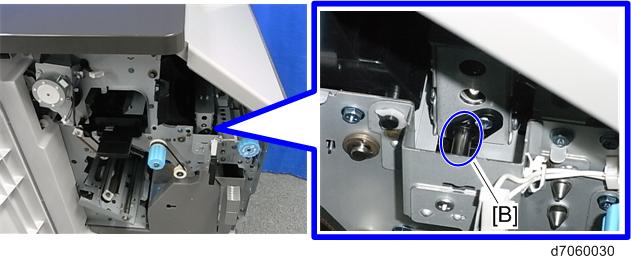
- After inserting the pins [B] of the punch unit stay into the front and rear holes of the punch unit, fix the punch unit with two screws.
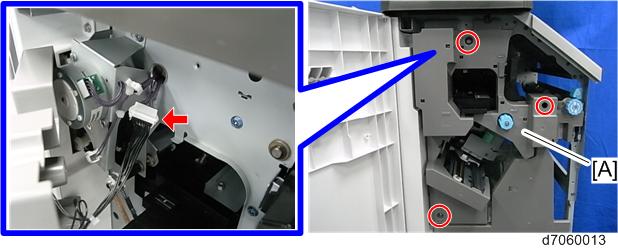
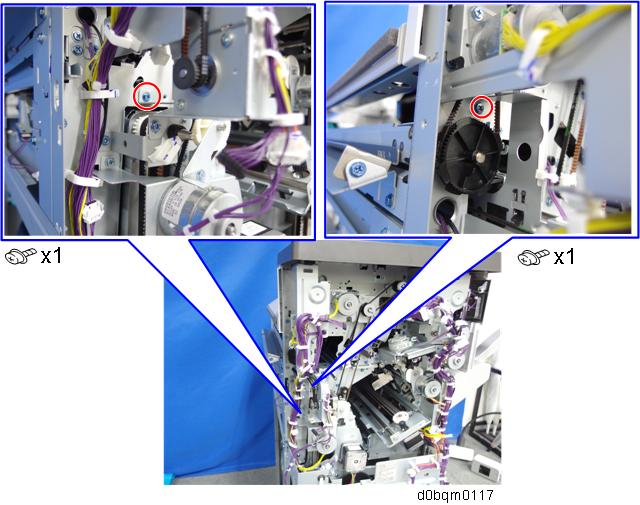
Attach the punch unit movement motor unit [A]. (
×2)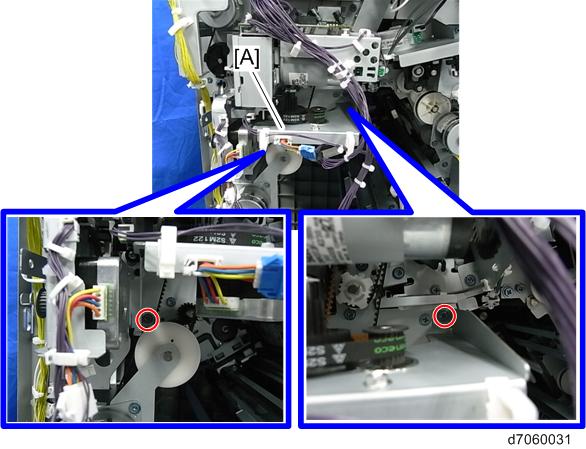
- Engage the gear [B] of the punch unit movement motor unit with the rack [C] of the punch unit.
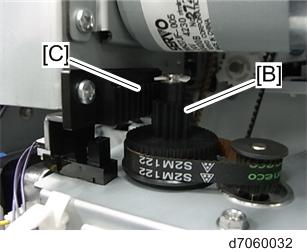
- Engage the gear [B] of the punch unit movement motor unit with the rack [C] of the punch unit.
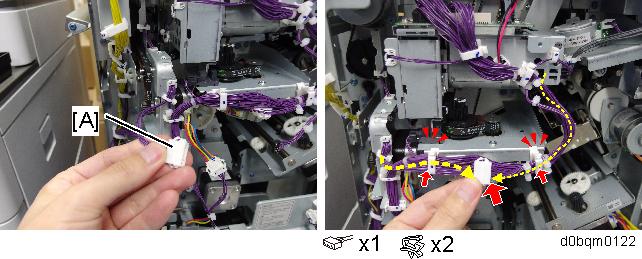
- At the rear part of the finisher, release the clamped harness.
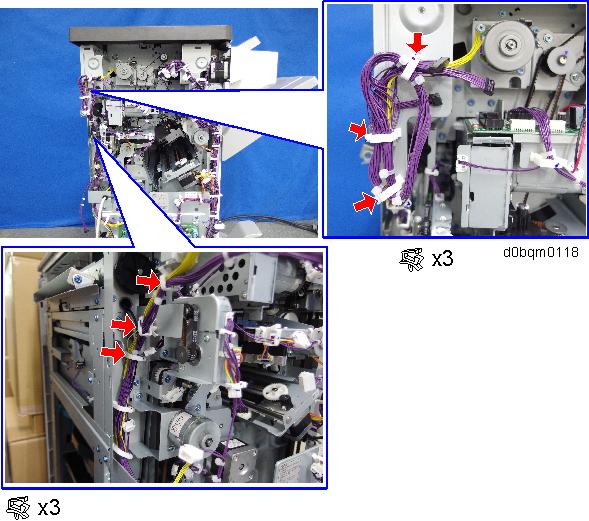
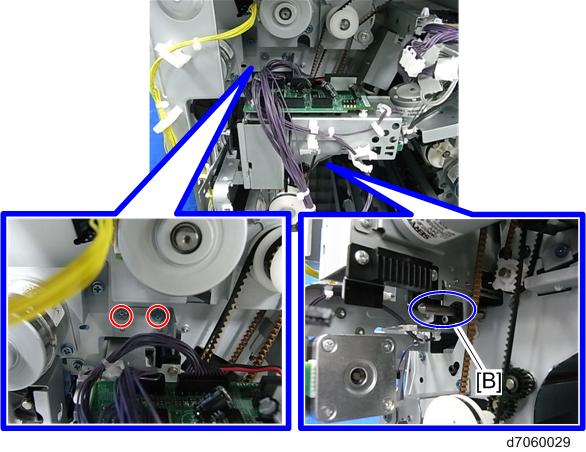
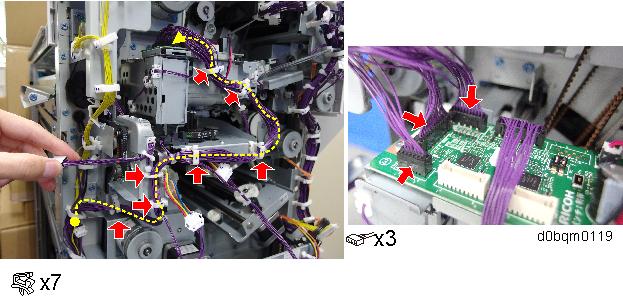
- Route the harness and connect it to the punch unit board as shown below.
Pull out the harness clamped (with 3 pins) to the finisher, and then connect it to the relay connector at the bottom of the side-to-side detection unit.
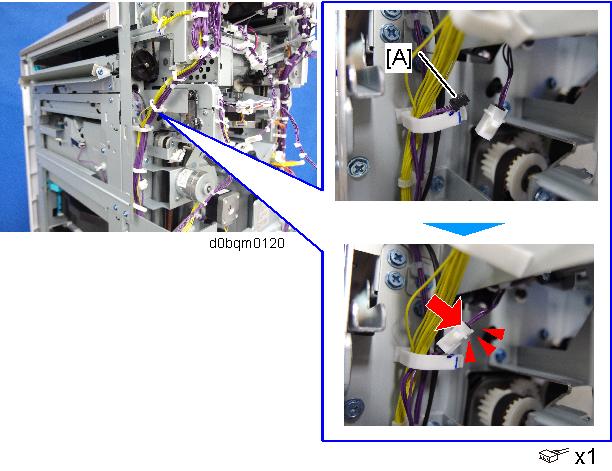
- Route the connector [A] of the punch unit movement motor unit as shown below, and then connect it to the punch unit board.
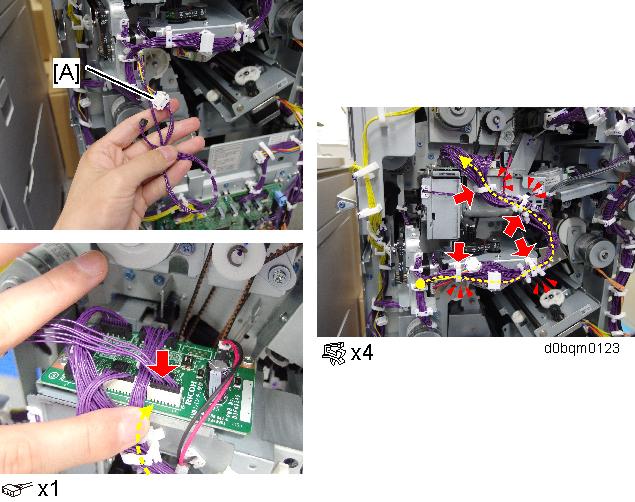
- Unclamp the connector [A] of the side-to-side detection unit, and then connect it to the relay connector.
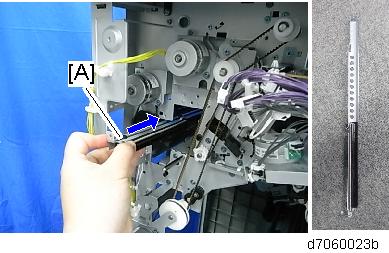
- Route the long harness connector [A] as shown below, and then connect it to the punch unit board.
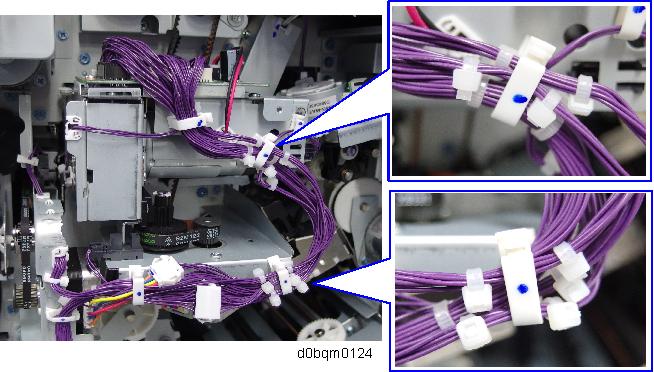
- After connecting all the harnesses, check that the cable tie has been applied to the following positions next to the clamps.
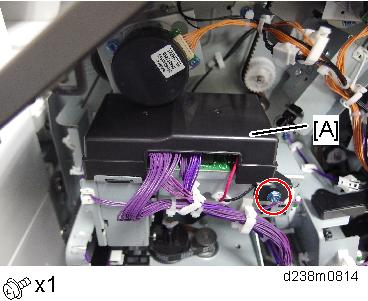
- Attach the supplied cover [A] to the punch unit board.
- Attach the hopper [A].
- Attach the rear upper cover, the rear lower cover, the inner cover.